Getting started with the Appointedd JSON API
Welcome to the documentation for Appointedd's public JSON API. This is the second iteration (v2) of our public API that aims to have full coverage of our (v1) API and is planned to have full coverage of all Appointedd's functionality. It is currently in active development meaning that some endpoints are still missing as it doesn't fully cover the functionality of our v1 API yet. Although this API is still in beta we will not be making breaking changes, except in cases where something is incorrect.
Our API aims to fully comply with the JSON API specification (with the exception of our OAuth endpoints which comply with the OAuth 2.0 Specification). Should you find that an endpoint, request, and/or response does not comply with the specification please raise this issue with our support team or your account manager.
Our API is fully described by an OpenAPI v3.x specification file which you can access as JSON or YAML. The specification provided by those endpoints are automatically updated whenever any updates to our API are released.
Authentication
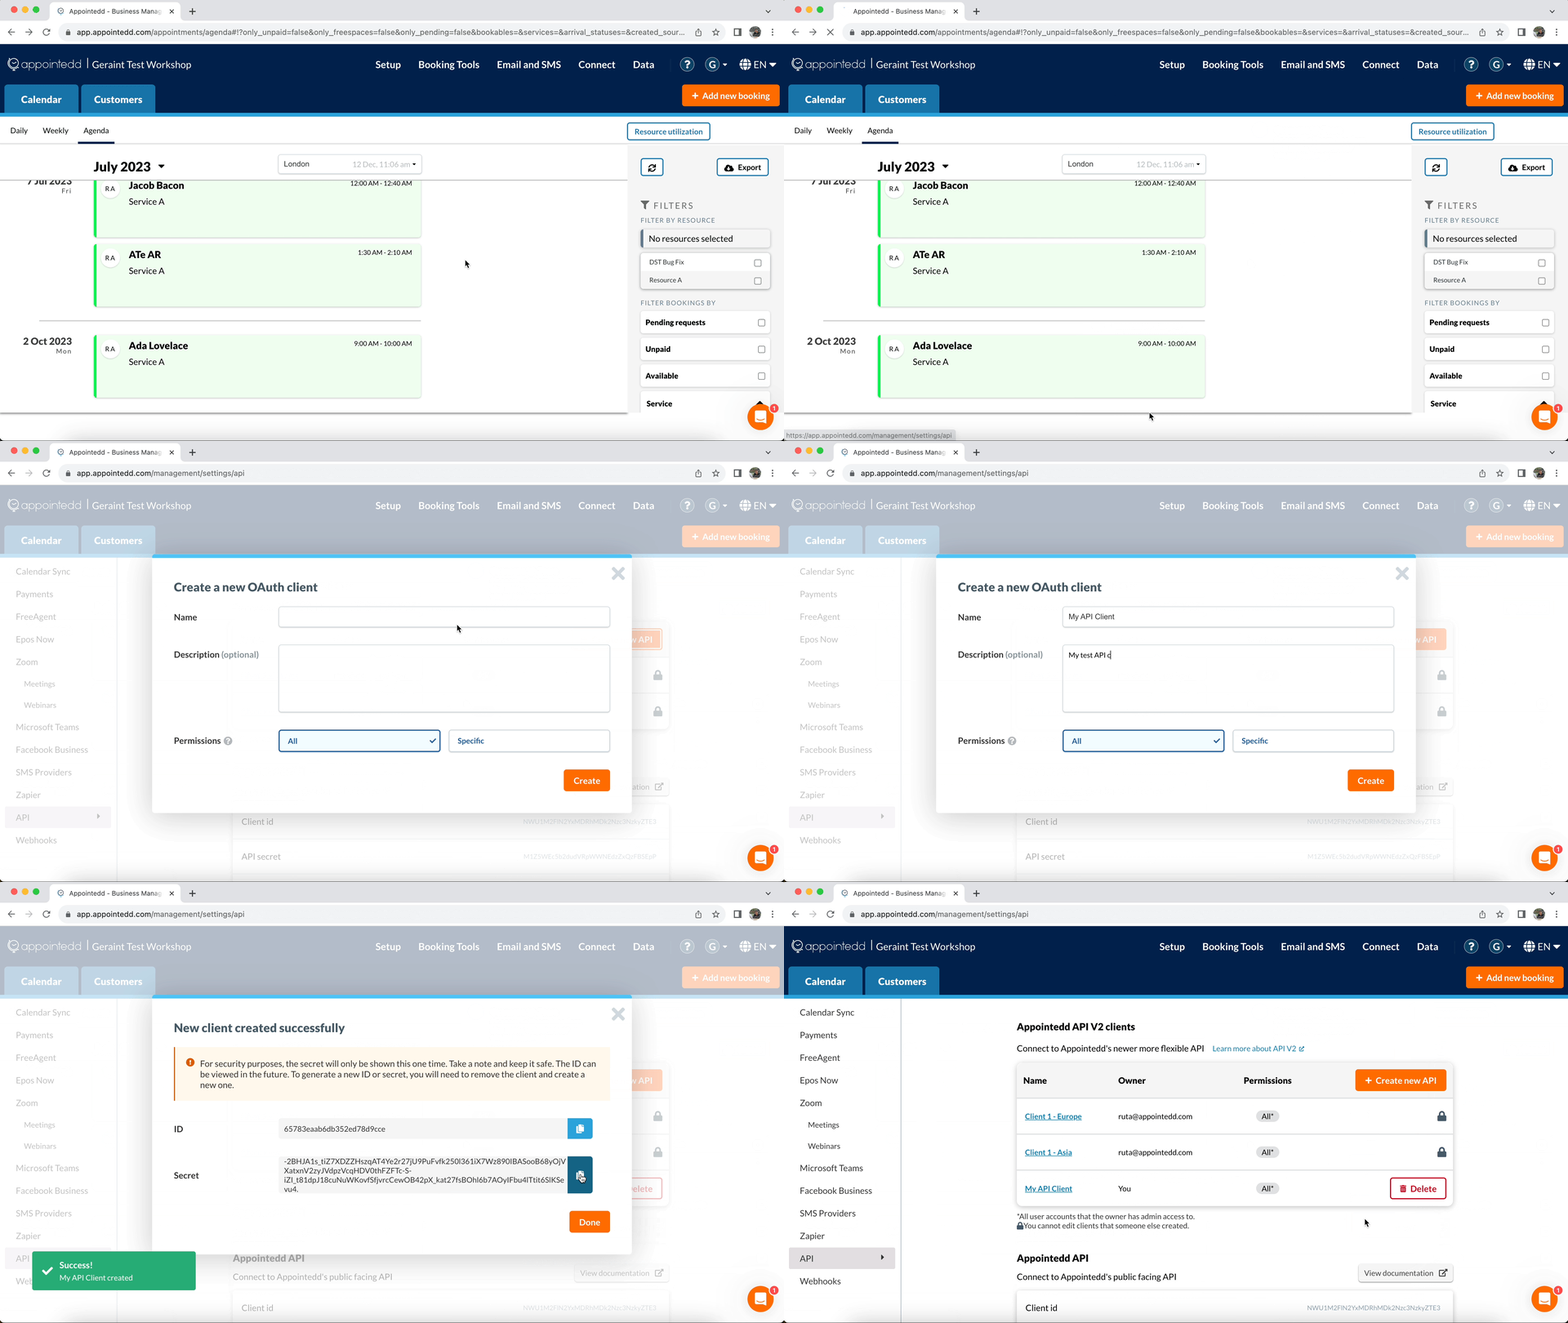
This version of the API makes use of OAuth 2.0 client credentials flow. To get started you'll first need to create a new OAuth client from either the OAuth clients page from your accounts list hallway if you have access to more than one account or the API integration page from any of your Appointedd accounts

To create a new API client:
- Click the Create New API button
- Type in a Name for your new client and optionally a Description
- Set the permissions for your client, you can select All to grant the client access to all of the accounts you have access to or select Specific to choose one or more accounts from a list of accounts that you have access to
- Copy your client's ID and secret and store it securely. For security reasons your client's secret will never been shown again. If you lose this you'll need to delete this client and create a new one.
Once you've completed the flow to create a new OAuth client store your client ID and secret in a secure store (we recommend either a application secrets management service and/or a password manager depending on your use case) as for security reasons your client's secret will never be displayed or accessible again. If you lose your client secret you will have to delete your client and create a new one.
To authenticate your API requests as your new client you must first create a new access token which you'll use your client's ID and secret to do so. You'll do this by making a request to our Create OAuth Token endpoint.
curl --request POST \
     --url https://json-api.appointedd.com/v2/oauth/tokens \
     --header 'accept: application/json' \
     --header 'content-type: application/json' \
     --data '
{
  "grant_type": "client_credentials",
  "client_id": "CLIENT_ID",
  "client_secret": "CLIENT_SECRET"
}
'
By default all access tokens created will expire in 1 hour. You can specify a custom number of seconds for expiry between 300 (5 minutes) and 315360000 (10 years) in a expires_in property in your request body when creating the token. For security we recommend using a shorter expiry and having your application refresh the active creating a new token near/on/after the time (for example when you receive a 401 response) that your current token expires at. You can also choose to use a single long-lived access token if you would prefer to not have any refresh logic in your application and the threat model for that mechanism is acceptable for your application.
We support calling this endpoint with either a JSON payload (application/json) or a form body (application/x-www-form-urlencoded). The client_id and client_secret can either be provided as properties in your payload object or you can provide them in an Authorization header using the basic authentication scheme with the client ID as the username and the client secret as the password.
You can find more details in the documentation for the Create OAuth Token endpoint.